

Introduction
Have you ever wondered what happens when you type a simple docker run command? While it might seem like magic, there’s a fascinating sequence of events that unfolds behind the scenes. In this blog post, I’ll break down the Docker container creation process in simple terms that anyone can understand.
The 8-Step Journey of a Docker Container
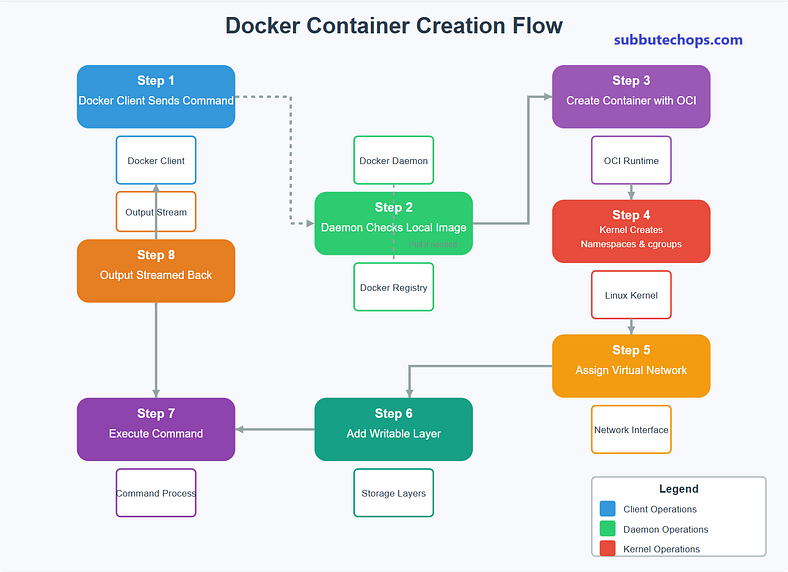
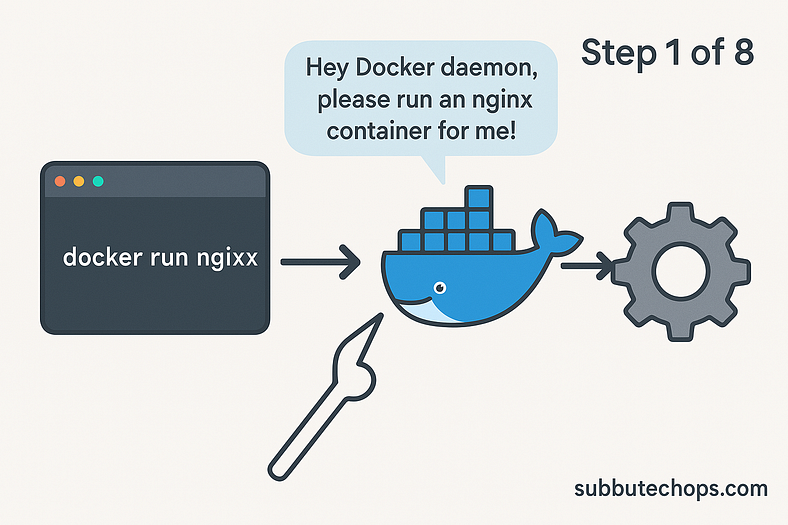
Step 1: Docker Client Sends Command
When you type a command like docker run nginx in your terminal, you’re talking to the Docker client. This client:
- Takes your command
- Formats it properly
- Sends it to the Docker daemon (the engine that does the actual work)
Think of it like ordering at a restaurant — you (the user) tell the waiter (Docker client) what you want, and they take your order to the kitchen (Docker daemon).
Step 2: Docker Daemon Checks Local Image
Once the Docker daemon receives your request, it first checks if it already has the image (in our example, nginx) on your computer.
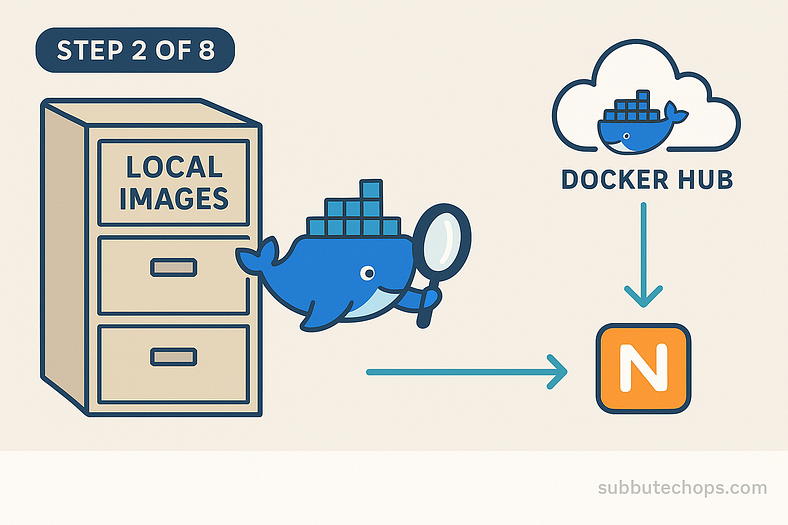
If it doesn’t find the image:
- It connects to Docker Hub (or another registry you’ve configured)
- Downloads the image
- Stores it locally for future use
This is like the kitchen checking if they have all the ingredients. If not, they send someone to the store to get what’s needed.
Step 3: Create Container with OCI Runtime
The Docker daemon doesn’t actually create the container itself. Instead, it hands off this job to an OCI (Open Container Initiative) runtime, typically runc. This standardized container runtime:
- Takes the image
- Creates container specifications
- Prepares everything for the Linux kernel

Step 4: Kernel Creates Namespaces & Cgroups
Now the Linux kernel steps in and creates two important things:
- Namespaces: These provide isolation by making the container think it has its own copy of resources (network interfaces, process IDs, etc.)
- Cgroups (Control Groups): These limit how many resources the container can use (CPU, memory, etc.)
Namespaces are like giving the container its own private room, while cgroups are like setting rules for how much of the house’s electricity and water it can use.

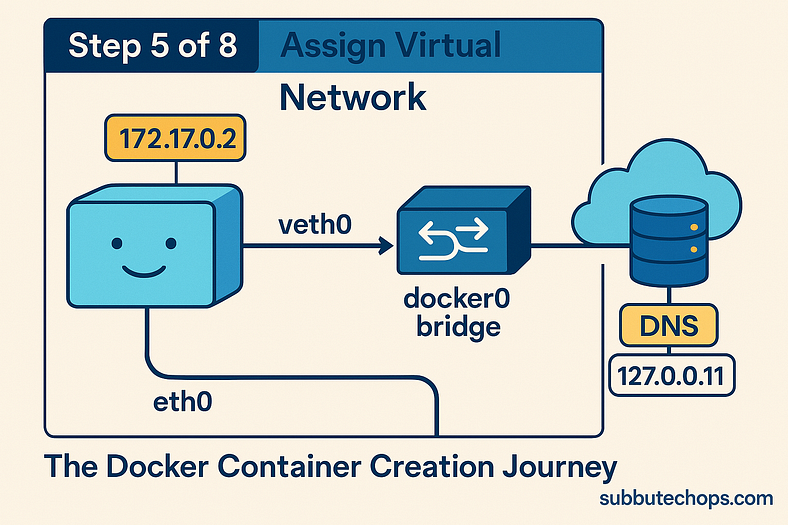
Step 5: Assign Virtual Network
Docker sets up networking so your container can communicate:
- Creates a virtual network interface (veth pair)
- Connects one end to the container and one end to the Docker bridge
- Assigns the container an IP address
- Sets up DNS resolution so the container can find other services by name
This is similar to setting up a new phone with its own phone number and contact list.
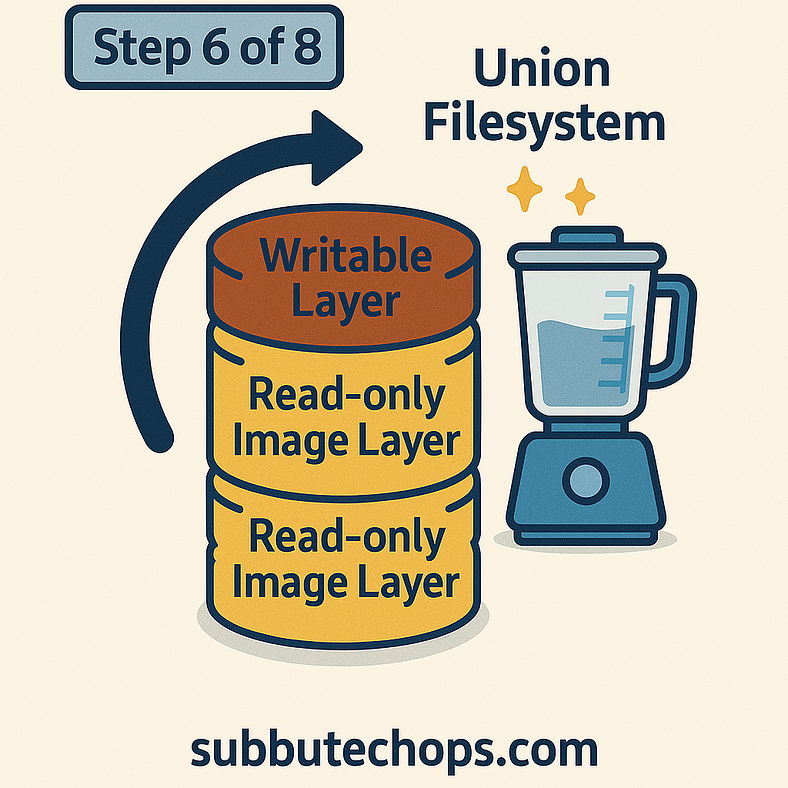
Step 6: Add Writable Layer
Docker images are made up of read-only layers, but containers need a place to write data. Docker:
- Mounts all the read-only image layers
- Adds a new writable layer on top where all changes will be stored
- Uses a union filesystem to combine these layers so they appear as one filesystem
Think of this like giving someone a reference book (read-only) and a notebook (writable) — they can read from the book but write their notes in the notebook.
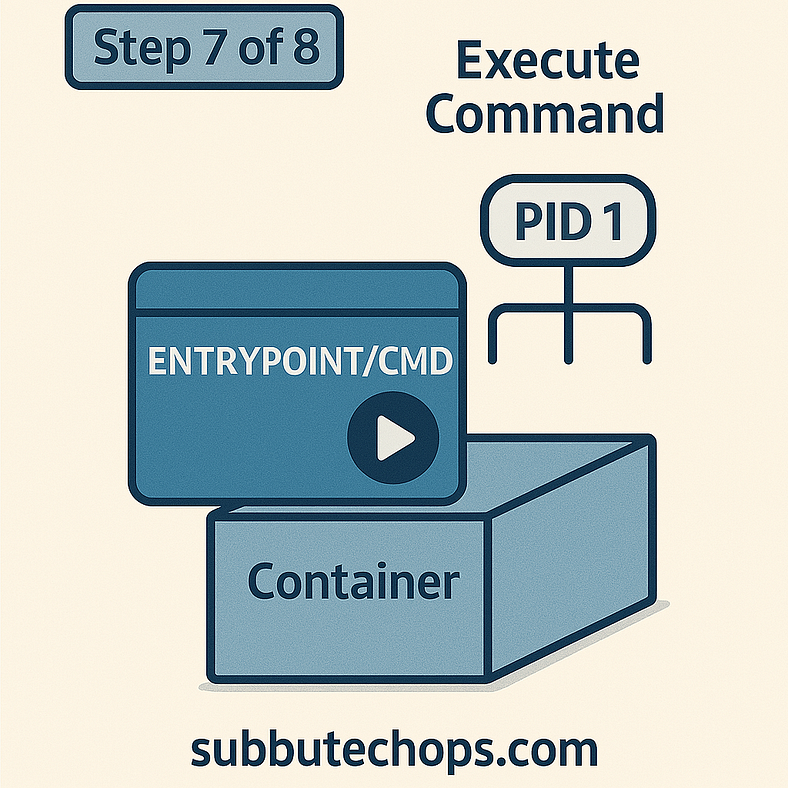
Step 7: Execute Command
With everything set up, Docker now executes the container’s default command (usually defined in the image’s Dockerfile as CMD or ENTRYPOINT). This launches the main process that the container will run.
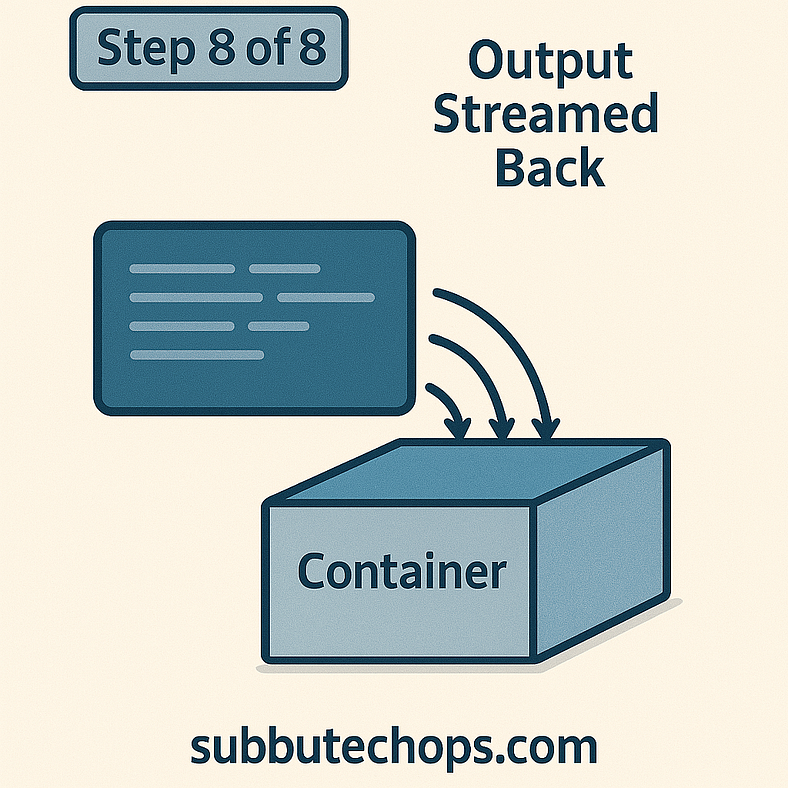
Step 8: Output Streamed Back
Finally, any output from the container (logs, error messages, etc.) is captured by Docker and streamed back to your terminal. This allows you to see what’s happening inside the container even though it’s running in isolation.
This is the power of Docker’s container creation flow — complex operations are abstracted away, letting you focus on your application rather than infrastructure details.
🧠 Easy way to remember:
Client → Daemon → Image → Runtime → Kernel → Network → Filesystem → Execute → Output
Conclusion
Understanding the 8 steps of Docker’s container creation flow helps you better utilize this powerful technology. Next time you run a Docker container, you’ll have a much clearer picture of what’s happening under the hood.
From sending a simple command to having a fully functional, isolated application environment, Docker handles the complexity for you — but now you know how it works!
Follow subbutechops.com for more practical guides and technical deep-dives into containerization and DevOps practices!